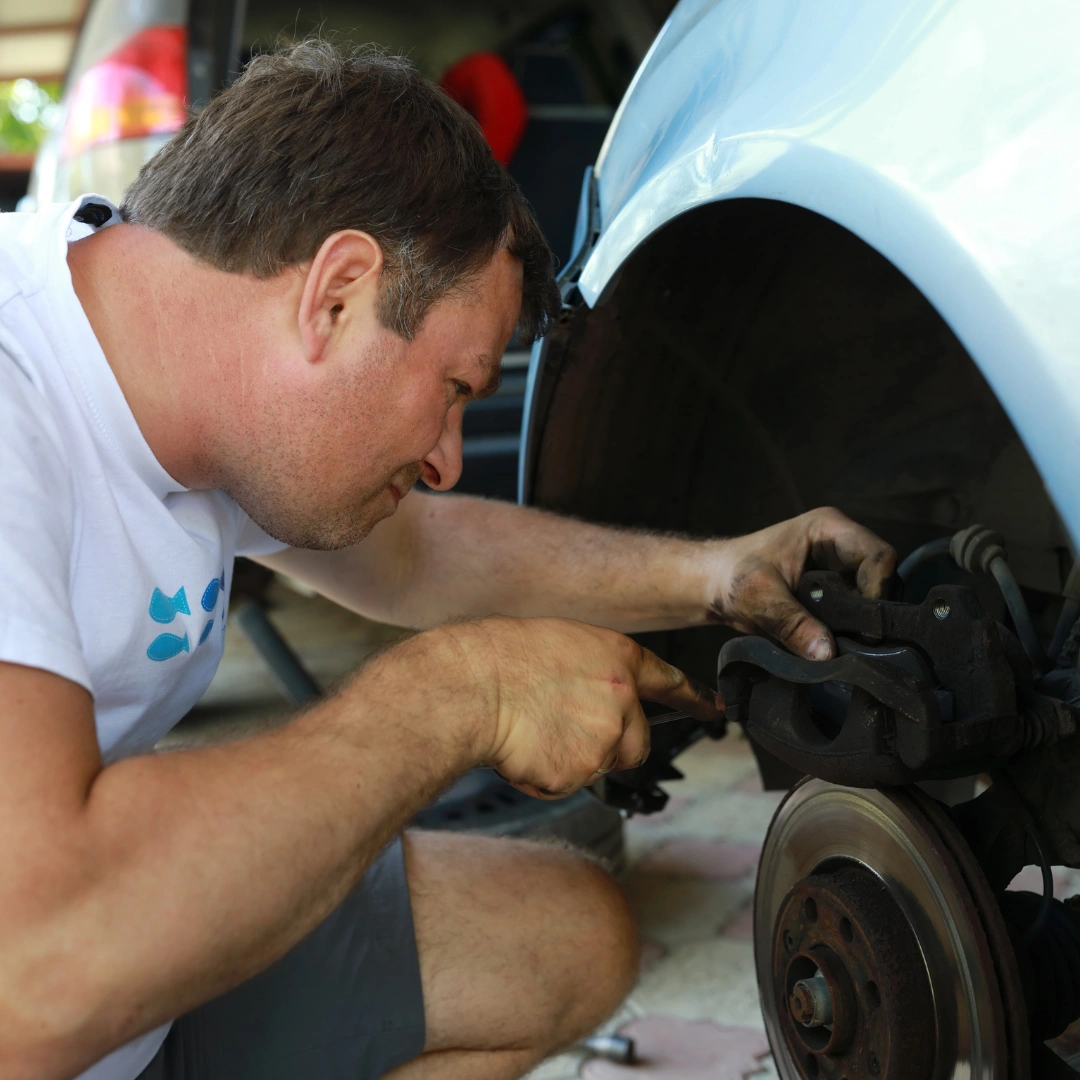
Replacing your brake pads regularly helps your vehicle stop or slow down by converting the vehicle's kinetic energy to thermal energy through friction. Brake pads are the key components of disc brakes and play a major role in a vehicle's braking system. Here are the steps to replace your brake pads
Key Takeaways:
|
Table of Contents
- Step-by-Step Guide to Replacing Your Vehicle's Brake Pads
- Signs You Should Replace Brake Pads
- How Often Should You Replace Brake Pads?
Step-by-Step Guide to Replacing Your Vehicle's Brake Pads
Tools you may need for DIY Brake Pad Replacement
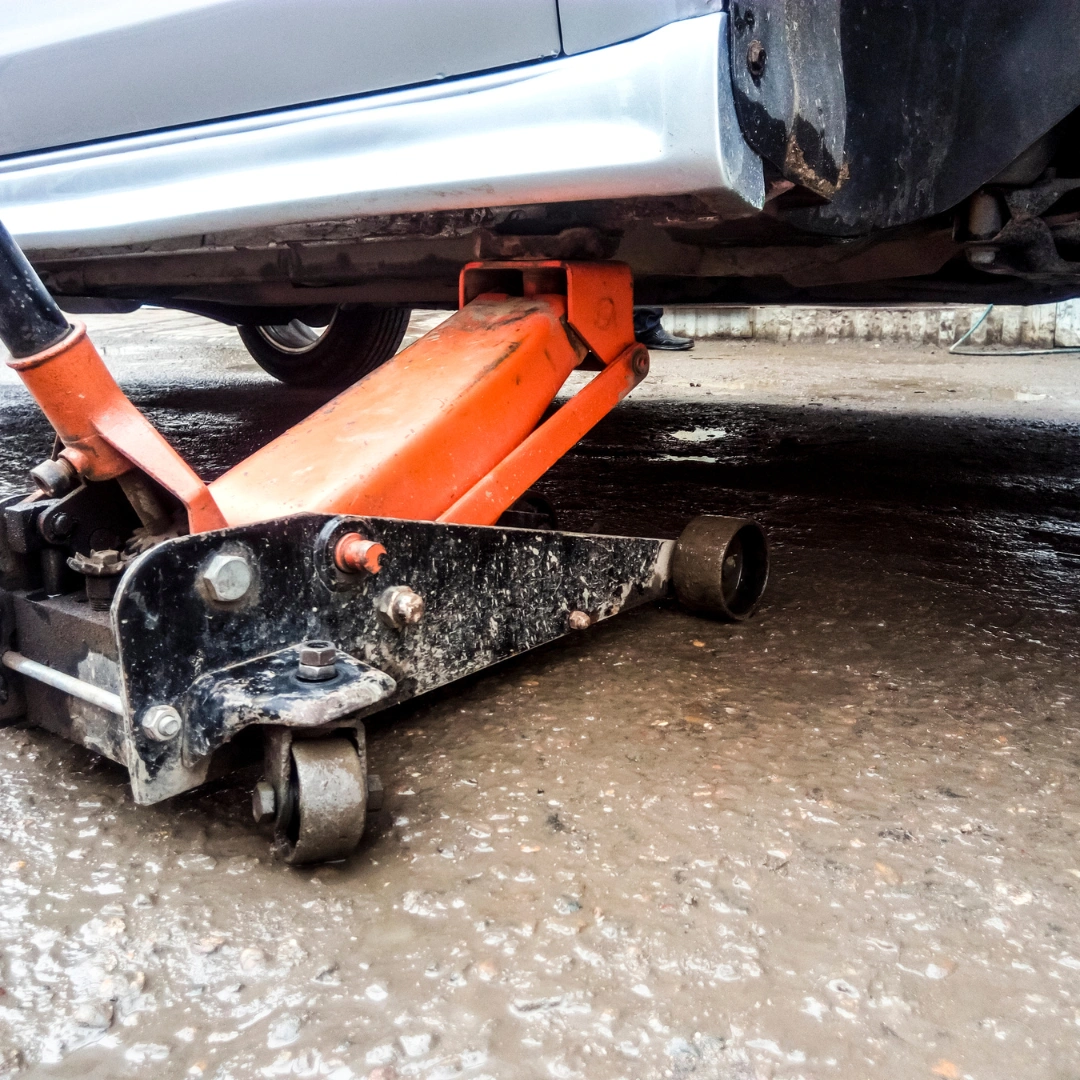
Car jack stand
Lug wrench
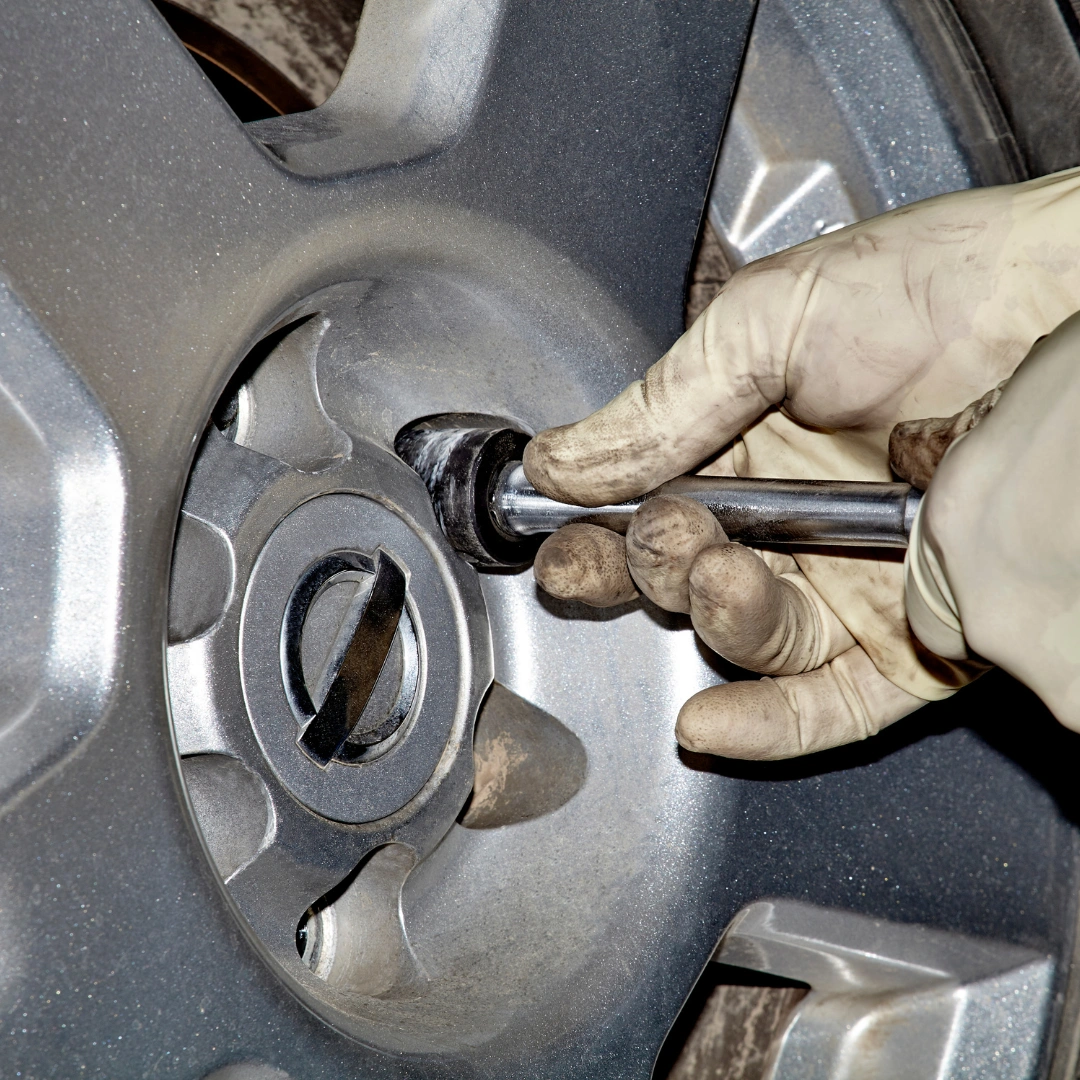
The lug wrench is used to remove the lug nuts that secure the wheels to the vehicle. By loosening and removing these nuts, you can take off the wheel and gain access to the brake components, making it possible to change the brake pads.
Disposable gloves
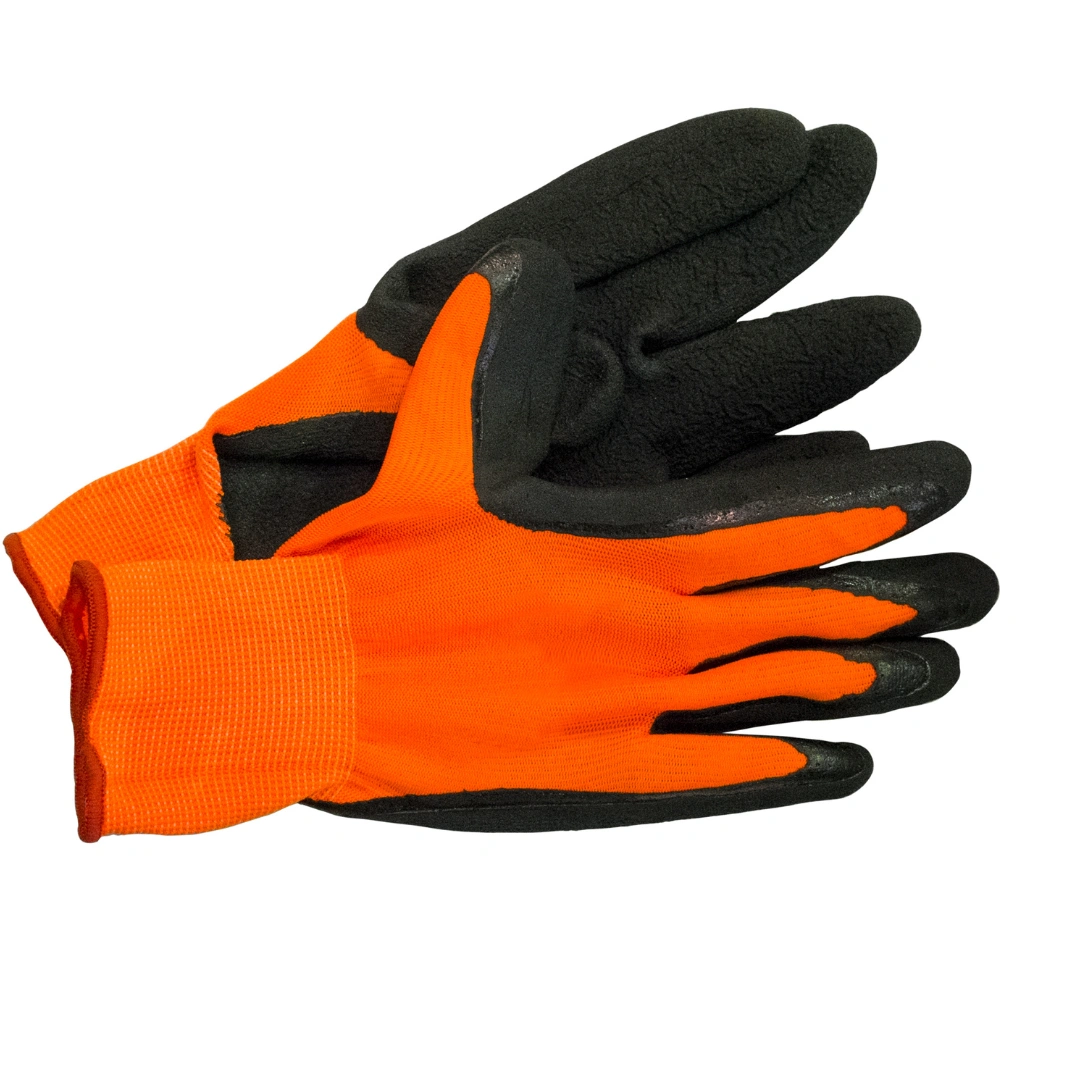
Wearing disposable gloves helps keep your hands clean while working on your car. Brake dust and grease can be difficult to clean off your hands, and some automotive chemicals can be harmful to the skin. Gloves also provide a better grip on tools and components, reducing the chances of accidents.
C-clamp or brake spreader
A C-clamp or brake spreader is used to retract the brake caliper piston, creating enough space for the new, thicker brake pads. Gently compressing the piston back into the caliper ensures proper fitment of the new brake pads and allows the caliper to be reinstalled over the brake rotor without any issues.
Turkey baster
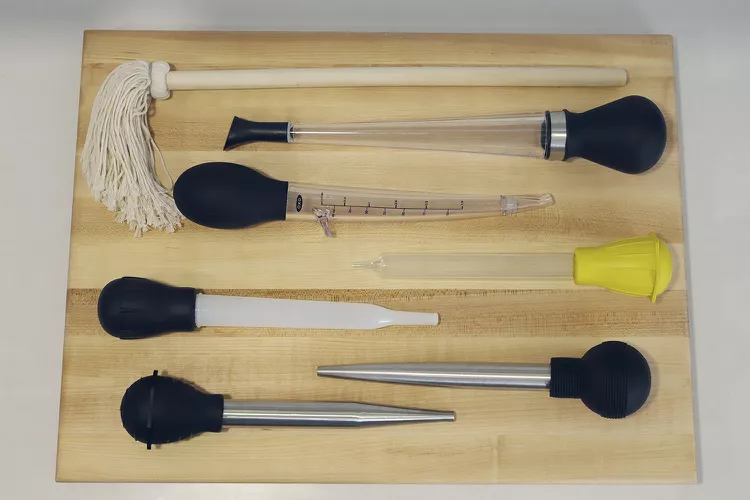
The Spruce Eats / Donna Currie
A turkey baster can be used to draw out excess brake fluid from the master cylinder reservoir. When the brake caliper piston is compressed, the brake fluid may rise in the reservoir, potentially causing it to overflow.
Removing some fluid beforehand helps prevent spills and maintains the appropriate fluid level. Be sure to dispose of the old brake fluid properly, as it is hazardous to the environment.

Here are the 9 steps to replace your brake pads
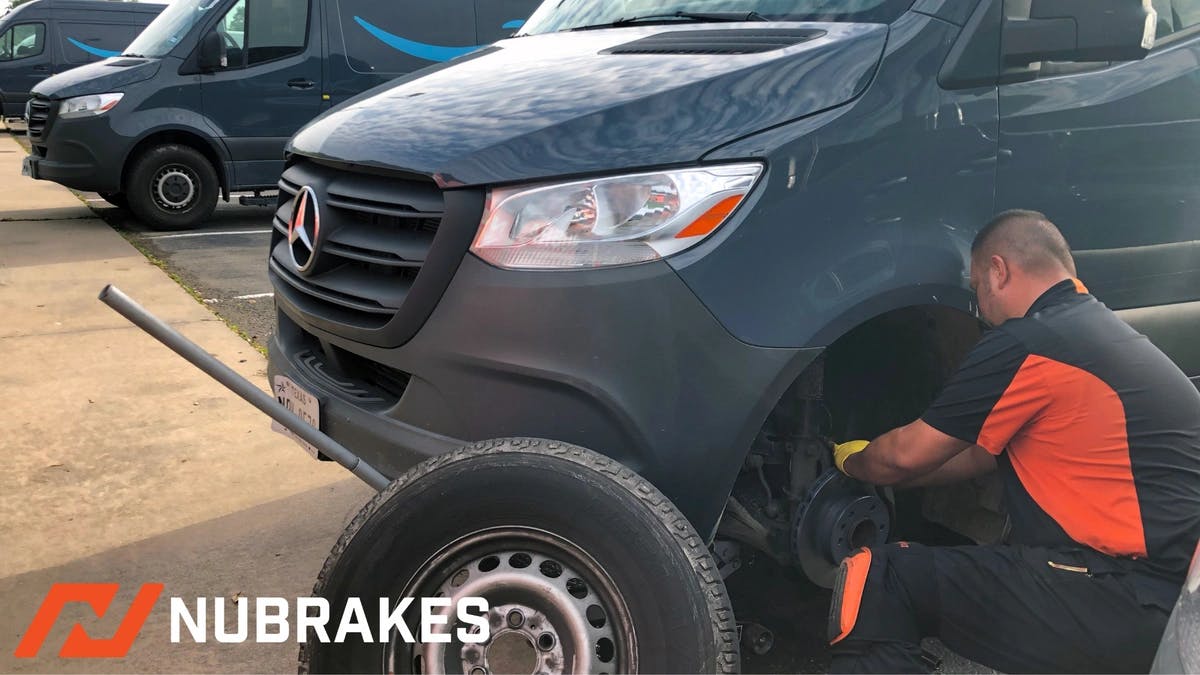
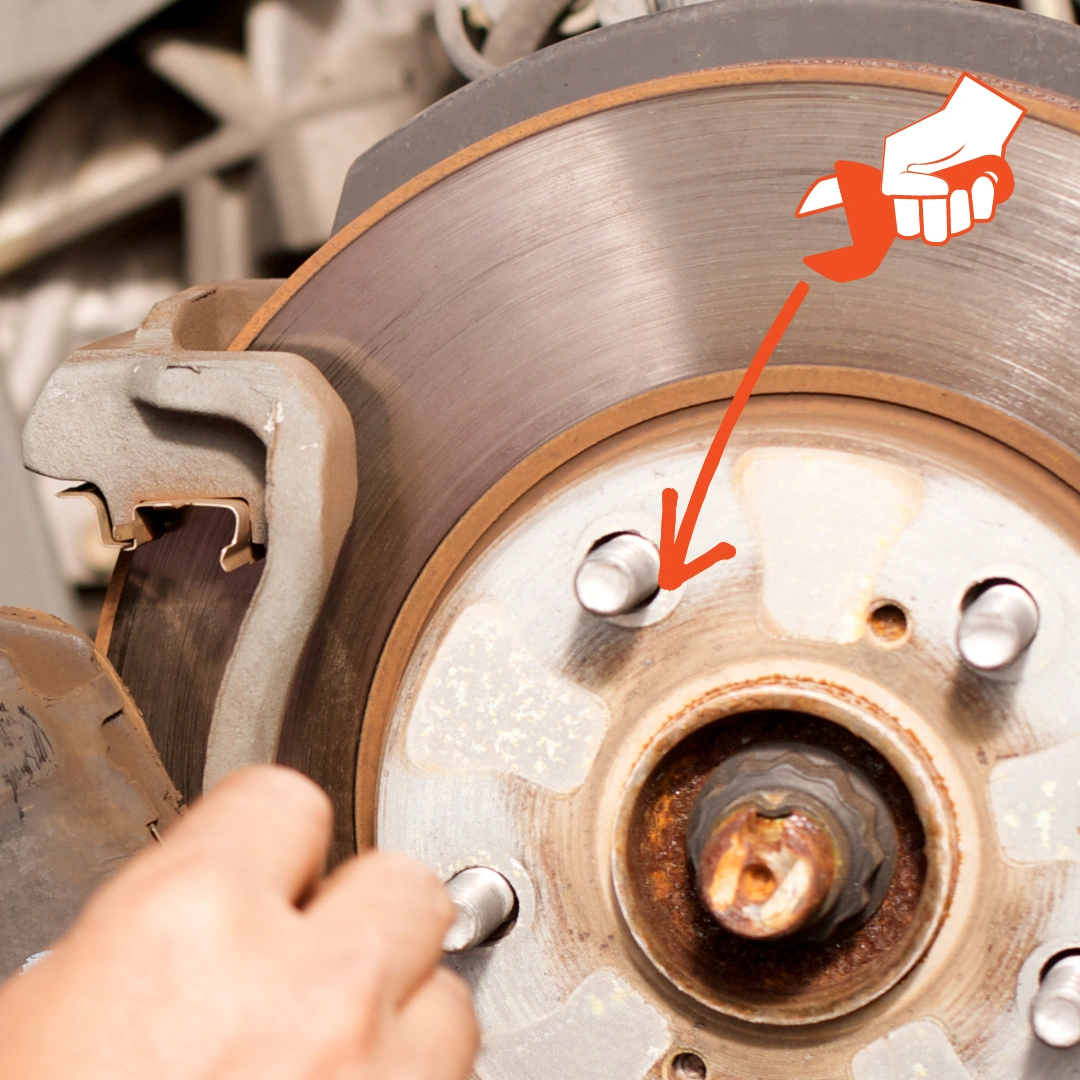
Remove the wheel
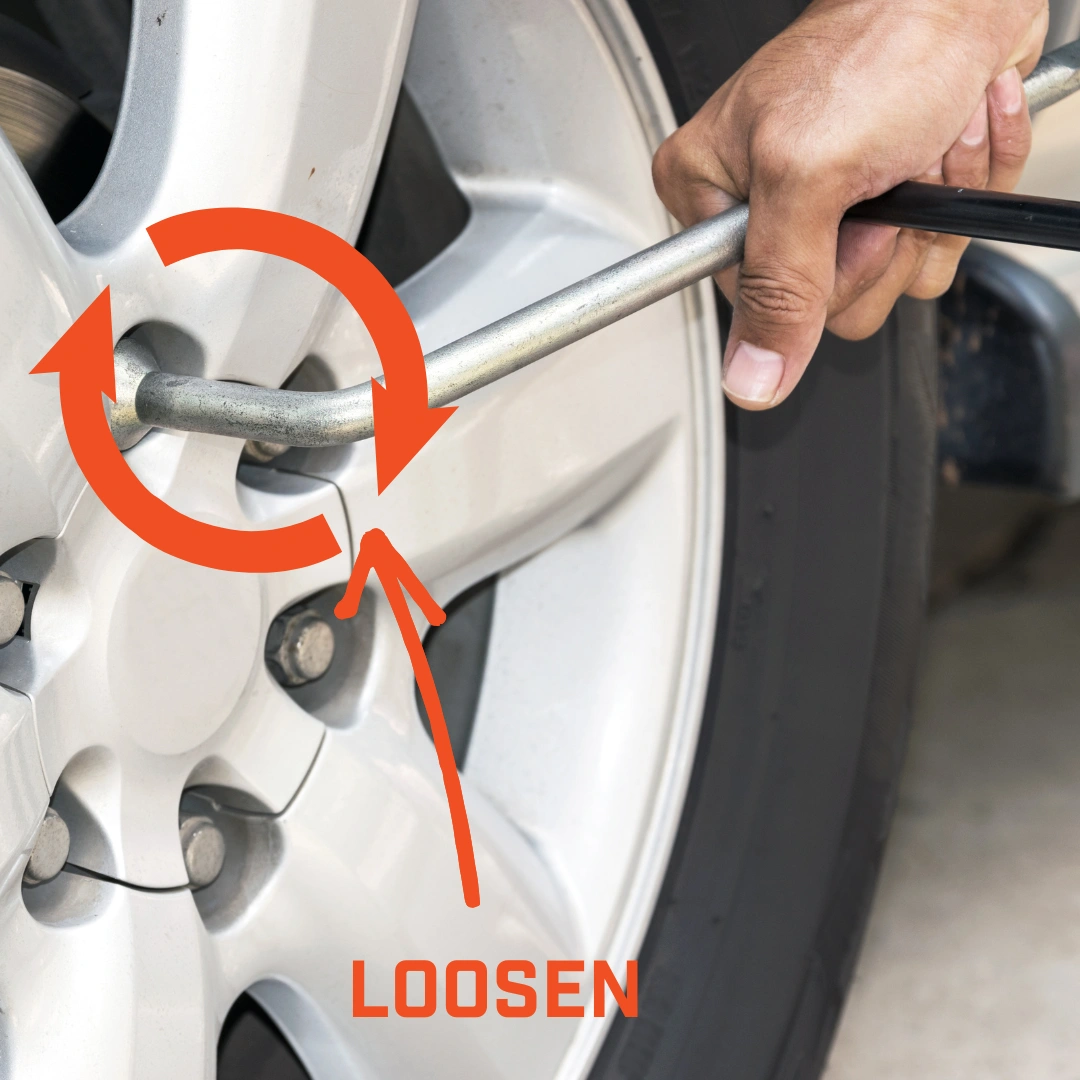
You can start the brake pad replacement procedure by removing the wheel. To remove the wheel, you need to loosen the lug nuts, jack up the car, and place a jack stand under the car's frame. Once the car is raised, continue removing the lug nuts and access the brake assembly after removing the wheel.
Wear safety goggles, protective gloves, secure jack points for the jack, and jack stands.
Check your brake fluid level
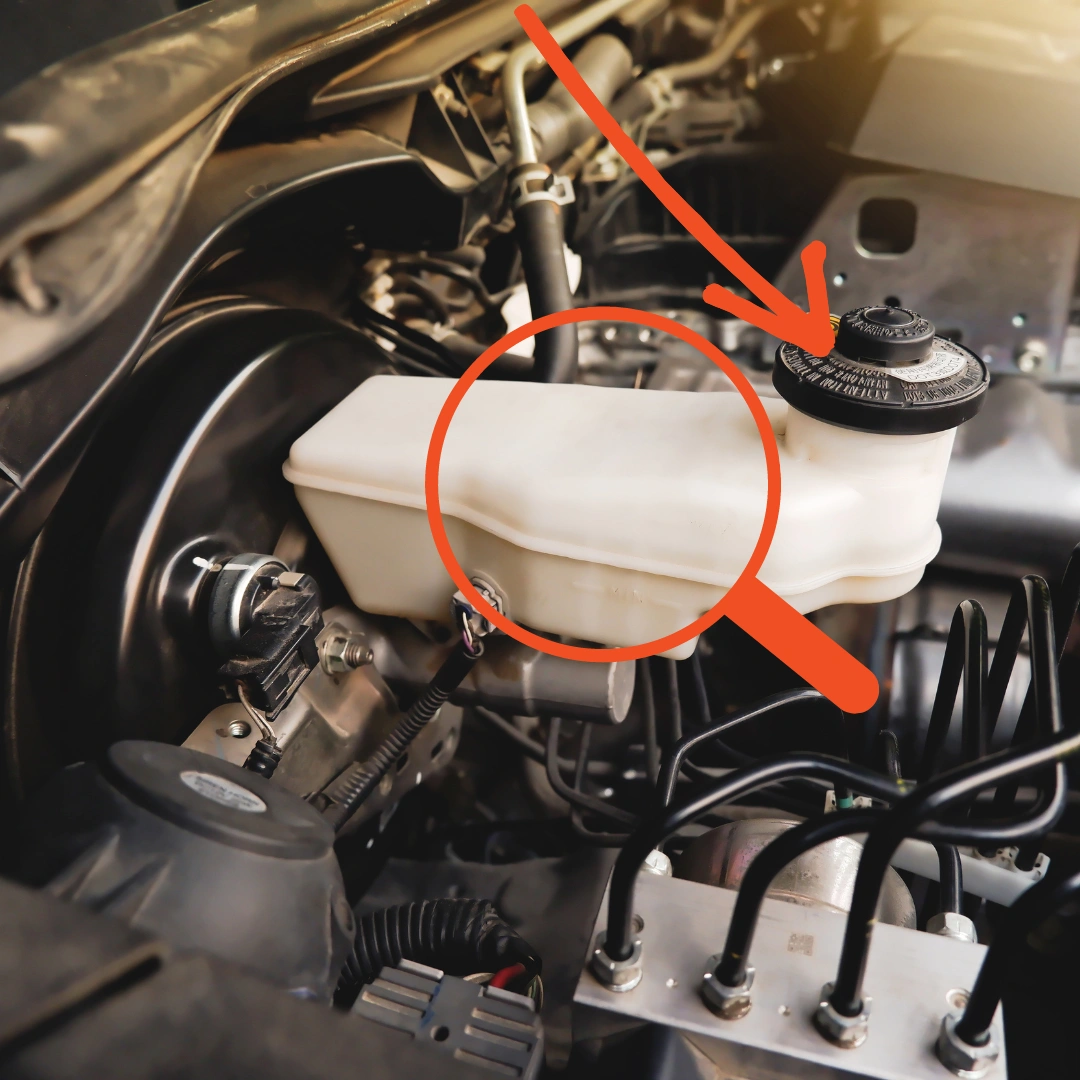
Open the car hood and confirm that the brake fluid reservoir is full. If the reservoir is too full, use a turkey baster, or a similar device, to remove some fluid to avoid spillage when you compress the brake caliper piston.
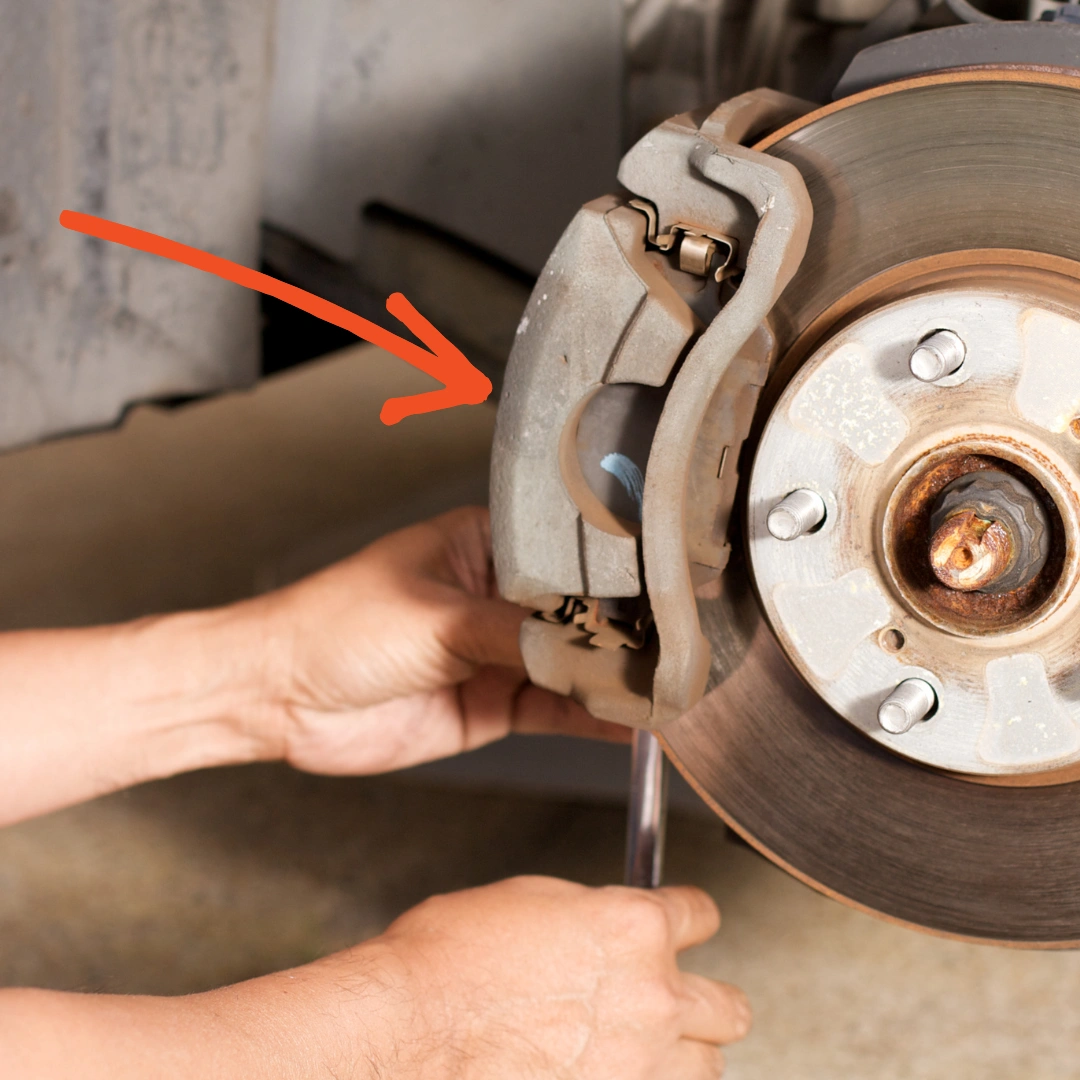
Remove the caliper bolts

Using a ratchet and socket set, gently remove the caliper bolts and the two slider bolts that hold the caliper in place. Remove the caliper assembly and place it on top of the rotor, firmly connecting the brake line.
Remove the brake pads
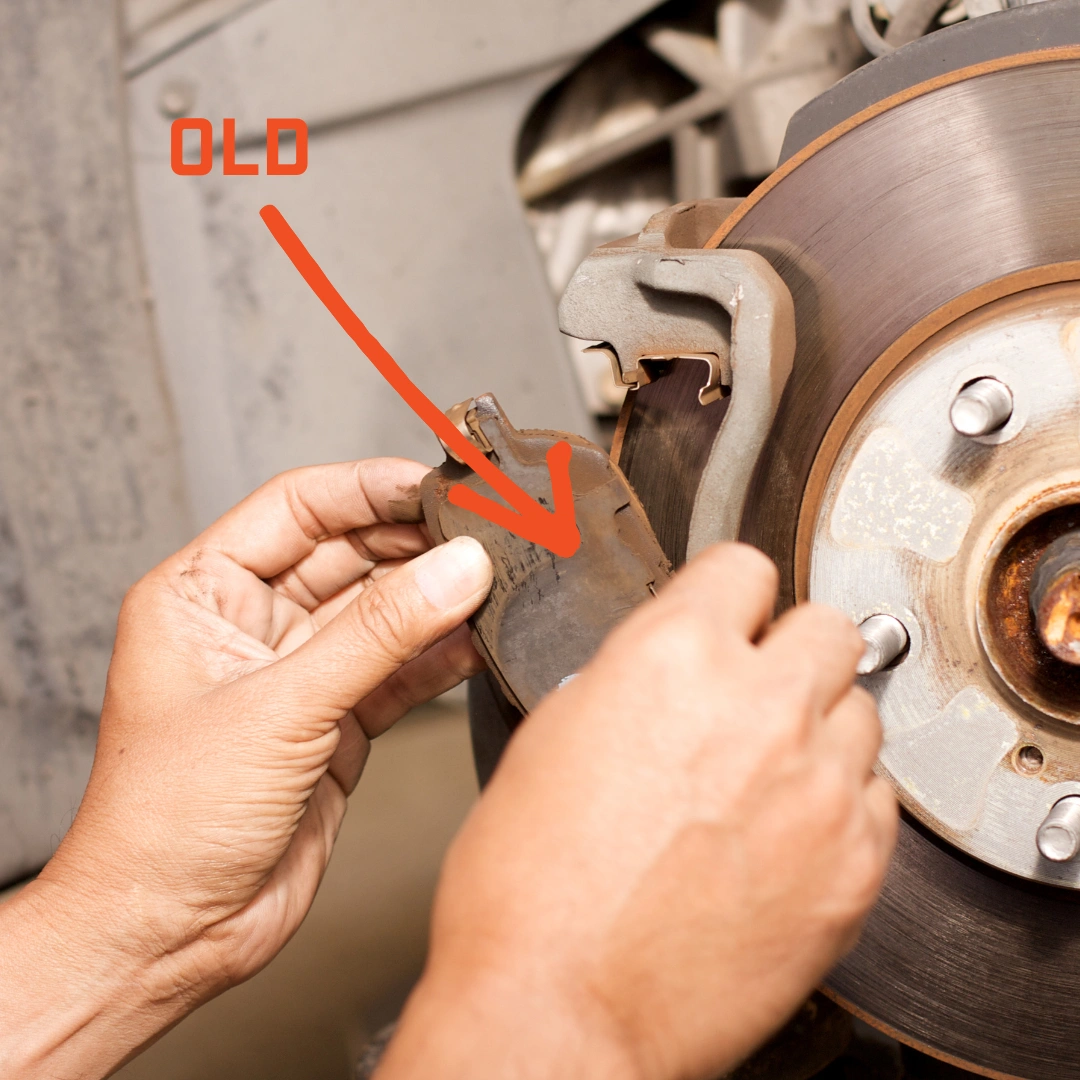
After removing the caliper assembly, you should have access to the old brake pads. Note their orientations so that you can install the new pads in the same way and start removing the brake pads from both sides of your brake rotor.
Note: make sure to check the old pads for uneven wear patterns. This could be an indication that the pads are sicked due to a worn pad or caliper hardware, lack of lubricant, or a sticking caliper piston.
Replace the retaining clips
The retaining clips allow the pads to slide back and forth easily. Pull out the old clips and replace them with the new ones, making sure to place them in the appropriate direction. Also check the bolts, guides, and rubber boots for any signs of wear or damage.
Retract the caliper piston
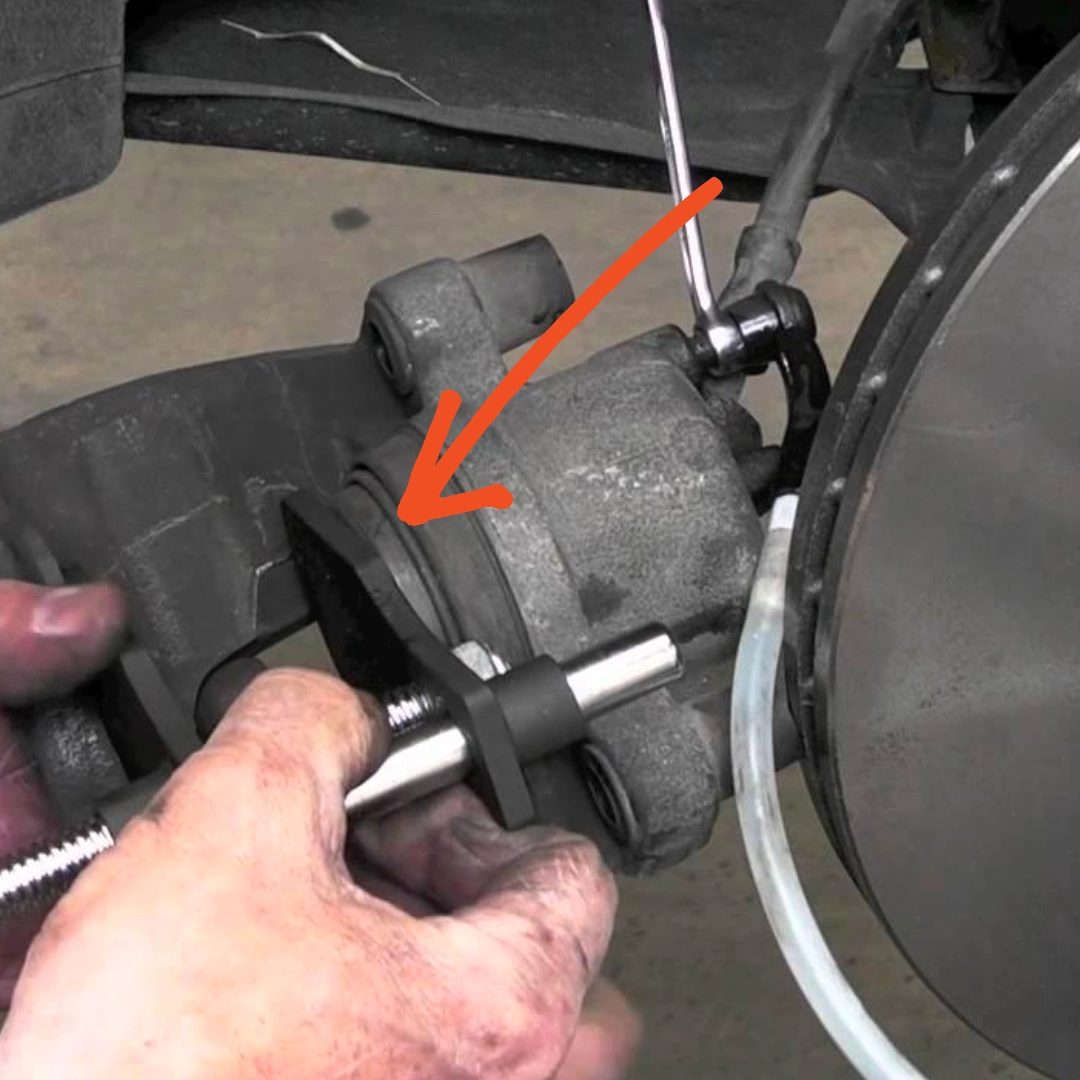
For fitting new pads, you have to retract the caliper piston back into its housing. This can be done by fitting a woodblock and a 'C clamp over the piston. The piston moves back and displaces the brake fluid back into the master cylinder reservoir.
While pushing the piston back, there may be chances of the brake fluid level rising. Therefore, it is recommended to open the master cylinder reservoir and check it often. In cases where the brake fluid starts to overflow, the turkey baster can be used to suck out the brake fluid.
Install the new brake pads
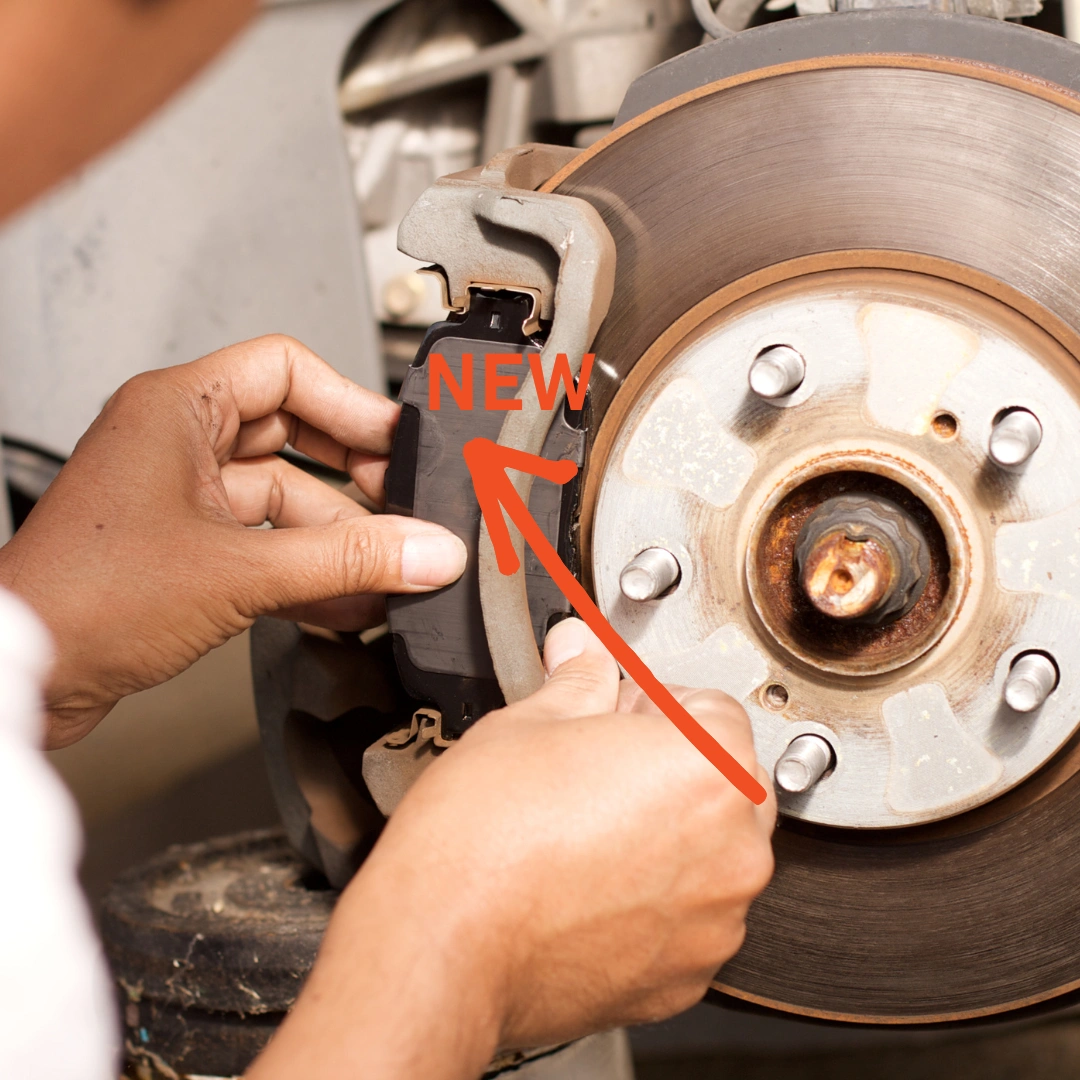
After ensuring the proper orientation, fit the new brake pads the same way as the old ones. Apply a small amount of brake grease to the metal plates to ensure a smooth fit of the new brake pads.
Adjust the caliper assembly
After installing the new pads, slide the caliper assembly back into position and align the mounting or locating pins. Position the caliper against the circular piston and tighten them with pins or bolts using the brake tool. Secure them in place using the socket wrench.
Refit the wheel
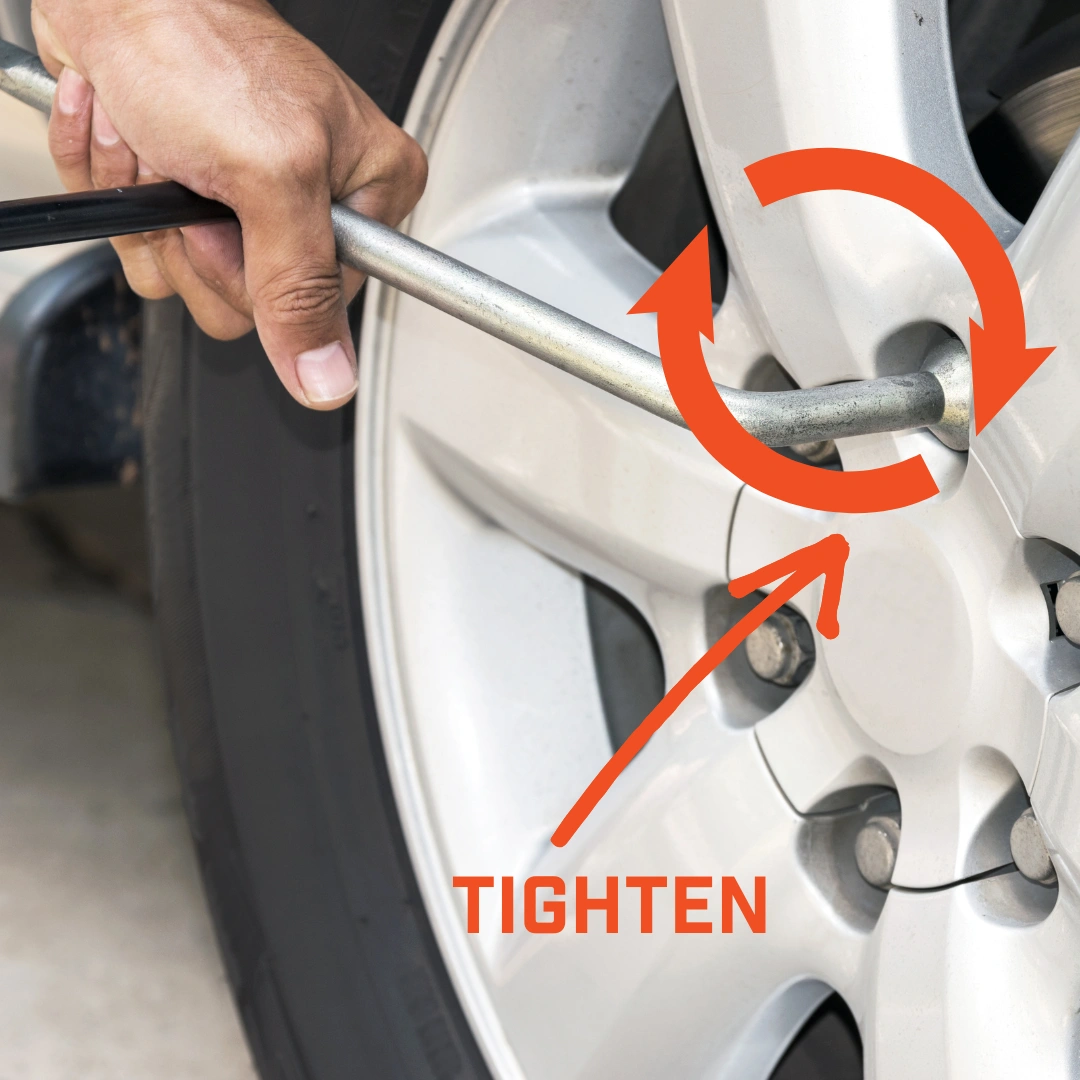
Place the wheel back and tighten the position using the lug nuts. Follow up by re-inserting the jack and removing the jack stand. After properly refitting the wheel, lower your car to the ground and secure the lug nuts in place.
Signs You Should Replace Brake Pads
-
Noisy braking
The first sign is if your brake pads produce lots of noise every time they are engaged. Brake pads may sound like screeching, squealing, grinding, or whining noises due to excessively worn brake pads. This sound is made by a small metal attachment on the brake pad backing plate to alert the driver. Make sure to replace your brake pads when you hear noises to prevent further damage and expensive repairs.
Sometimes if the brakes are wet, the pads may have a similar squealing sound, but if the sound disappears after pressing the brake pedal, it was likely just because there was water on the brake pads.
-
Poor braking performance
If it takes longer than usual for a vehicle to stop, it could be because the brake pads are worn down, your brake fluid is low, or some unwanted material is trapped within the braking system. You should contact a brake mechanic as soon as possible to make sure that you stay safe on the road.
-
Vibration under braking
If you experience vibration every time you hit the brakes, this could be caused by warped rotors, contaminated rotors or pads, anti-lock braking system activation, or out-of-round drums. Vibrations may also arise due to sensitive braking due to incorrect or greasy brake pad linings, misadjusted master cylinder pushrod, or a faulty proportioning valve. Contact a car mechanic as soon as possible if you believe there may be a problem with your brake system.
-
Thin brake pad
If the width of the brake pad is less than a quarter of an inch, you should contact a brake specialist to replace your brake pads. As you use your brakes, the friction material attached to the brake pad deteriorates, leading to pad wear and thinning. The brake pads can be visually inspected by checking between the wheels' spokes and measuring the brake pad's size.
-
Brake light warning on the dashboard
If you see a brake light warning on your dashboard, this can indicate that your brake pads are getting worn and need to be replaced, you need to check the brake fluid in your master cylinder because there is a leak or your parking brake has a problem or is still engaged. Have a car mechanic look at the light and inspect your brakes to ensure your brake system is working.
How Often Should You Replace Brake Pads?
Brake pads and rotors should be replaced every 25,000 to 65,000 miles. Replacement periods can depend on various factors, such as the condition, the thickness of the brake pads, the type of driving, the type of pads, the weight of the vehicle, and the size of loads carried.
You should inspect the following parts of your vehicle:
- The brake pads should be inspected for uneven wear, abrasion, or any scoring.
- The thickness of the brake rotors should be measured to check if there are any significant changes.
- The brake disc condition should be checked for any cracks, scratches, or damage.
- The brake fluid level should be checked to ensure there is no leak.
- The brake lines, steering system, and wheel bearings should also be inspected.
It is crucial that your vehicle is well-maintained in proper working conditions and replaces any of its equipment whenever necessary. One major element of a car is its working brake system that helps to ensure a comfortable driving experience and handle the car well.
Ready to replace your vehicle's brake pads? Follow our step-by-step guide and get the tools you need for a successful DIY brake pad replacement.
And if you're not up for the task, contact Nubrakes Mobile Brake Repair for a hassle-free brake pad replacement at your doorstep!
References
- https://www.edmunds.com/how-to/how-to-change-your-brake-pads.html
- https://www.bridgestonetire.com/learn/maintenance/when-to-replace-brake-pads/
- https://www.homedepot.com/c/ah/how-to-change-brake-pads/9ba683603be9fa5395fab90f47bec40
- https://www.familyhandyman.com/project/how-to-change-front-brake-pads/
- https://www.championautoparts.eu/news/when-to-replace-brake-pads-discs.html